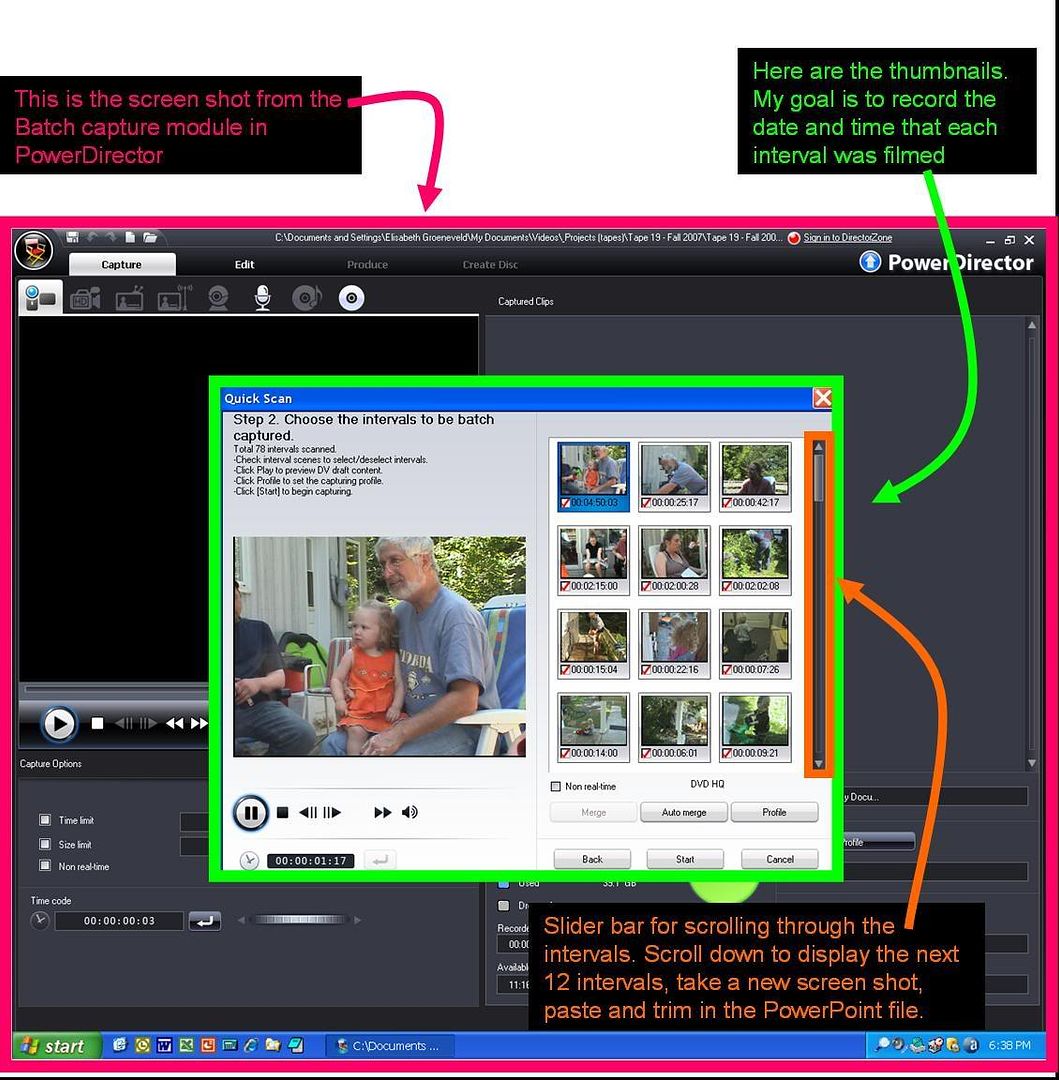
Here is how I record the date and time of each captured interval of my DV tapes using PowerDirector:
Step 1) Select automatic batch capture in PowerDirector. Scan the tape and generate intervals. Each interval will show up as a thumbnail.
Step 2) Copy the thumbnail images using the “Print screen” keyboard shortcut, then paste into a PowerPoint file (or other image editing software of your choice).
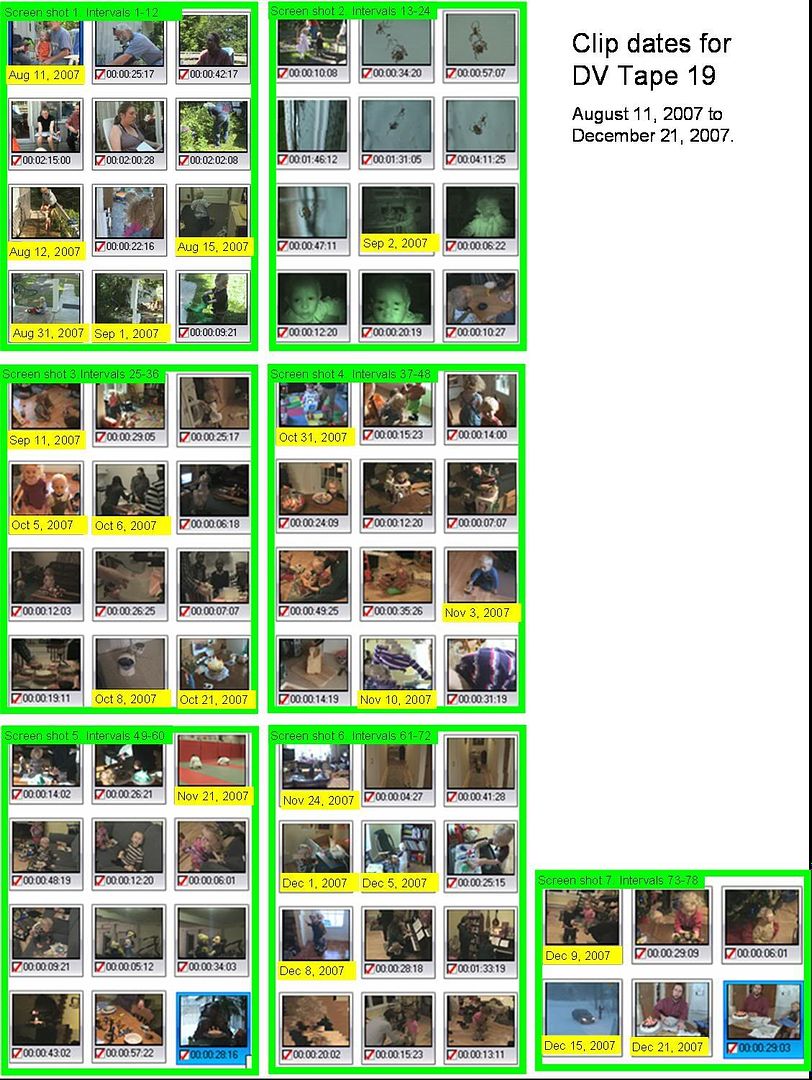
Step 3) In PowerPoint, trim the excess screen shot leaving only the thumbnails (see the second photo for the end result). Repeat for each page of interval thumbnails: use the slider bar to scroll down through the intervals.
Step 4) In PowerDirector, hold the mouse over each interval thumbnail. The date/time information will briefly appear. Record this information in the PowerPoint file. See page 2 for the final product.
Step 5) As I edit the footage in PowerDirector, I insert the date information into my movie using titles over a black colour board.
Note: I know, this is long, pedestrian and not terribly slick. But it always works, and only has to be done once for each tape.
Here is an example of a file that I created with all the clips dates recorded on it. I printed this file and used it as a reference while I edited the footage from DV Tape 19.
![[Post New]](/forum/templates/default/images/doc.gif) May 01, 2009 15:52
May 01, 2009 15:52